Once the graphic is created and you know that you may need it numerous times on your artboard, you can store it in the Symbols folder. Refer to the Symbols_practice.ai file.
For example, if I wanted to use this grouped shape with some text two or more times in my infographic, I would select the shape with my Selection tool and then in the Symbols panel click the New Symbol button. This brings up the New Symbol dialog box. Refer to Figure 8-198.
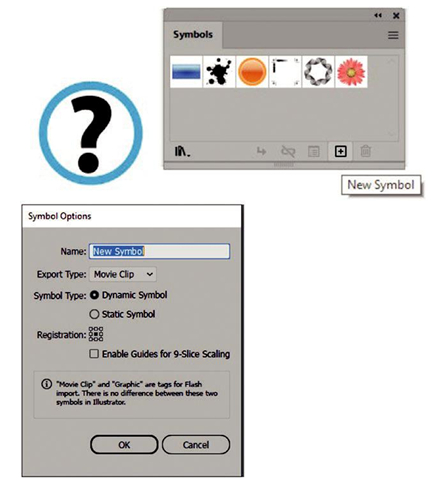
Figure 8-198. Use the Symbols panel to add a symbol and the Symbol Options dialog box to set the symbol type settings
While I will not go into all the settings, I will note that here, you can name the symbol. Leave the Export type as Movie Clip or Graphic. It makes no difference, and we are working in Illustrator and not Animate (formerly Flash). You can choose between the options of dynamic or static symbol. Generally, I choose Static, but I will show you what each can do. Keep the registration centered and keep enable guide for 9-slice scaling disabled as that is only for Animate and click OK. And the symbol will appear in the Symbols panel.
Note that a static symbol cannot have its colors altered if dragged onto the artboard from the panel, while a dynamic symbol can have its colors altered only with the Direct Selection tool if you select a stroke or fill, and you will discover that the original symbol in the panel is unaffected. The color change is made by selecting a color in the Swatches panel. The dynamic symbol will appear with a plus icon in the Symbols panel. Refer to Figure 8-199.
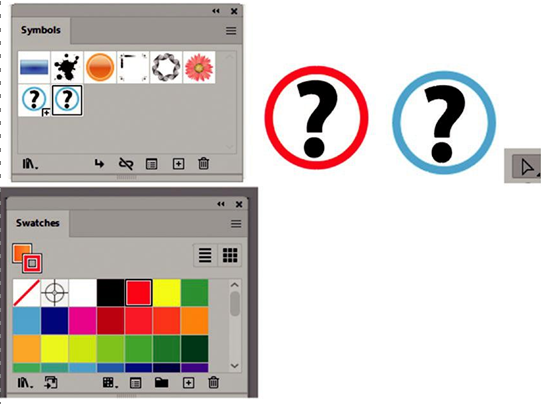
Figure 8-199. Symbols can be static or dynamic, and you can use the Direct Selection tool and the Swatches panel to alter color
Warning Do not use the Recolor option in the Control panel on Symbols as this will affect both the symbol on the artboard and the original in the panel.
On the lower area of the Symbols panel, if you need to place another symbol, use the place symbol instance arrow icon. To break a symbol from the panel, use the broken link icon. Refer to Figure 8-200.

Figure 8-200. Lower half of the Symbols panel for placing a new symbol on the artboard
Symbol options can be reviewed for a selected symbol with the list icon. As mentioned, you can use the New Symbol icon to add a new symbol to the panel, or while a symbol is selected in the panel, the plus icon can be used to duplicate it if you drag a symbol onto it. Or delete a selected symbol using the trash can icon. Refer to Figure 8-200.
Note There are a number of created symbols that can assist you in creating your infographic as well as a starting point, if you need to create an organizational chart or flow chart diagrams, found in the Illuminate Flow Charts and Illuminate Org Chart panels. You can access these and more symbols from the lower left library icon on the Symbols panel, and once the new panel is open, click a new symbol to add them to the Symbols panel. Then drag onto your artboard and break the link to edit. Refer to Figure 8-201.
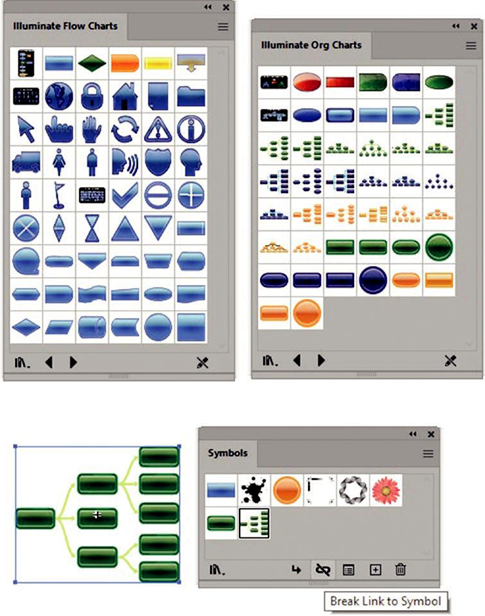
Figure 8-201. The Symbols panel libraries allow you to add flow diagram and org chart samples to your Symbols panel and then break link to symbol to edit
Lastly, I will just mention that if you need to edit a symbol, you can double-click it in the Symbols panel to enter the Symbol editing mode. This is indicated in the Layers panel. After you have made any adjustments to your symbol, use the left-pointing arrow icon below the rulers to exit Symbol editing mode. Refer to Figure 8-202.
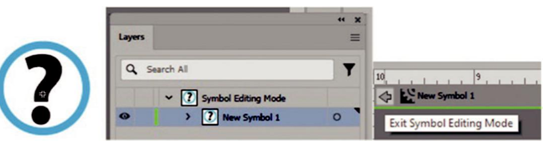
Figure 8-202. Use the Symbols panel diagram library to enter Symbol editing mode as seen in the Layers panel, and exit Symbol editing mode using the left- pointing arrow and return to the regular layer mode
Whether the symbol is static or dynamic, you’ll find similar settings in the Control panel. In this case, I left the instance name blank, but from here, you can edit the symbol, break the link, and reset if the symbol on the artboard has been scaled. Replace the symbol on the artboard with another from the symbols or set an overall opacity (0%–100%). Static symbols can only be replaced with other static symbols and dynamic with other dynamic symbols. Refer to Figure 8-203.
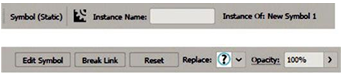
Figure 8-203. Use the Control panel to edit your symbol further
Other Control panel options mentioned are for recoloring and alignment when two or more symbols are selected. You can also move your symbol on the (x and y) coordinate values or scaling width (W) and height (H) which can have its width and height proportions constrained with the link icon enabled. These settings are based on the symbol registration point which was set to center earlier and indicated by the cross icon. Refer to Figure 8-204.

Figure 8-204. Use the Control panel to align and scale the symbol
You can learn more about symbols based on the following link:
https://helpx.adobe.com/illustrator/using/symbols.html
I will just mention that symbols can be used with the Blend tool for scaling, and you can apply basic appearance effects and graphic styles like drop shadow without altering the original symbol.
Summary
In this chapter, we reviewed the following topics regarding working with layers, adding colors to objects as well as adding type, and creating appearances, graphic styles, and symbols. We also looked at some new color and type options that have recently been added to Illustrator.
In the next chapter, you will be focusing on using the skills you have acquired to create your first infographic projects.